Aller au contenu
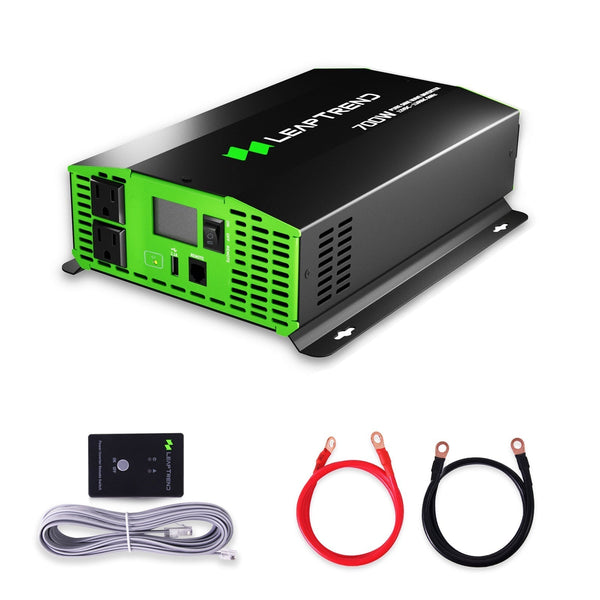
How to make a mini inverter 3,7v DC to AC 220v , banggood|Leaptrend 1000/2000 Watt Power Inverter for Lithium Batteries, DC 12V to 110V/120V AC Off-Grid Solar Pure Sine Wave Inverter on RV, Semi Truck, Coffee Van, Camping Outdoor, Household Appliances for
Création d'un mini-onduleur : conversion de 3,7 V CC en 220 V CA avec Banggood
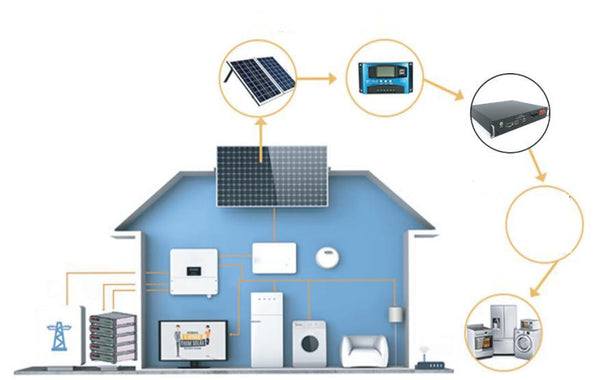
Les onduleurs sont des appareils incroyablement utiles qui permettent de convertir le courant continu (CC) en courant alternatif (CA), ouvrant ainsi un monde de possibilités pour alimenter divers appareils électroniques. Si vous souhaitez construire un mini-onduleur capable de convertir une entrée CC de 3,7 V en une sortie CA de 220 V, cet article de blog vous guidera pas à pas. Pour une solution fiable et efficace, nous vous recommandons l'onduleur LeapTrend.
Matériel requis :
Pour créer un mini onduleur qui convertit 3,7 V CC en 220 V CA, vous aurez besoin du matériel suivant :
- Kit mini onduleur (disponible sur Banggood ou d'autres plateformes en ligne)
- Fer à souder
- Fil à souder
- Fils
- Multimètre (à des fins de test)
- Source d'alimentation (3,7 V CC, comme une batterie lithium-ion)
- Lunettes de sécurité et gants (recommandés pour la protection pendant la soudure)
Guide étape par étape :
1. Procurez-vous le kit mini-onduleur : achetez un kit mini-onduleur sur Banggood ou toute autre plateforme en ligne fiable. Ces kits sont généralement livrés avec tous les composants nécessaires et un manuel d'instructions détaillé.
2. Familiarisez-vous avec les composants : Prenez le temps de comprendre les différents composants inclus dans le kit. Identifiez le circuit imprimé (PCB), les transformateurs, les condensateurs, les résistances, les diodes et les autres composants électroniques.
3. Lisez le manuel d'instructions : Lisez attentivement le manuel d'instructions fourni avec le kit mini-onduleur. Familiarisez-vous avec les étapes d'assemblage, le placement des composants et les instructions de soudure fournies.
4. Soudez les composants : Commencez par souder les composants sur le circuit imprimé en suivant les instructions. Prenez votre temps pour assurer une soudure et des connexions électriques correctes. Suivez les techniques de soudure et les précautions de sécurité recommandées.
5. Branchez l'alimentation : une fois les composants soudés, connectez la source d'alimentation 3,7 V CC, par exemple une batterie lithium-ion, aux bornes d'entrée prévues à cet effet sur le circuit imprimé. Assurez-vous que la polarité est correcte pour éviter d'endommager les composants.
6. Testez l'onduleur : utilisez un multimètre pour mesurer la tension de sortie de l'onduleur. Placez une charge appropriée, telle qu'une petite ampoule, sur les bornes de sortie CA. Assurez-vous que la tension de sortie CA est proche de la valeur souhaitée de 220 V et que l'onduleur est capable d'alimenter la charge.
7. Effectuez les ajustements nécessaires : si la tension de sortie ou les performances ne correspondent pas aux attentes, consultez le manuel d'instructions pour obtenir des conseils de dépannage. Apportez les ajustements ou corrections nécessaires aux soudures ou aux connexions des composants.
Conclusion:
Construire un mini-onduleur convertissant 3,7 V CC en 220 V CA peut être un projet amusant et enrichissant. En suivant les étapes décrites dans cet article et en utilisant un kit mini-onduleur Banggood ou une plateforme similaire, vous pouvez créer votre propre source d'alimentation portable pour petits appareils électroniques.
Il est important de noter que les mini-onduleurs peuvent présenter des limites en termes de puissance de sortie et d'efficacité par rapport aux onduleurs commerciaux plus grands. Pour les applications nécessitant une puissance plus élevée ou une fiabilité accrue, il est recommandé d'opter pour des onduleurs de qualité professionnelle comme ceux proposés par LeapTrend.
Privilégiez toujours la sécurité lorsque vous travaillez avec des composants électroniques et suivez les instructions du fabricant. Profitez pleinement de la construction de votre mini-onduleur et profitez des avantages du courant alternatif où que vous soyez !