Aller au contenu
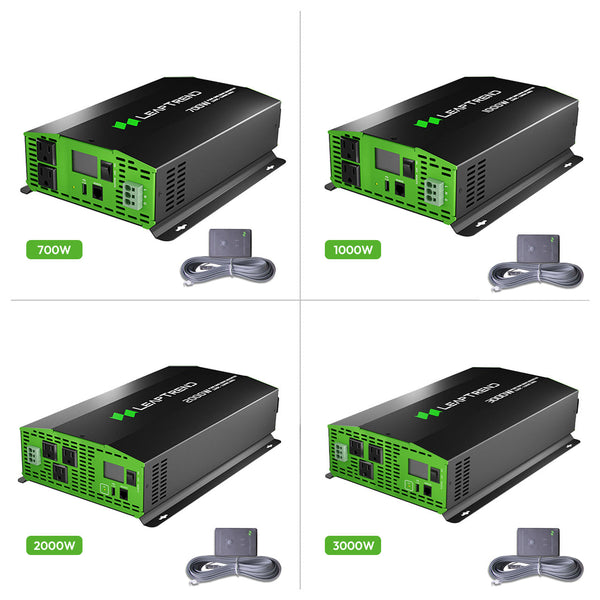
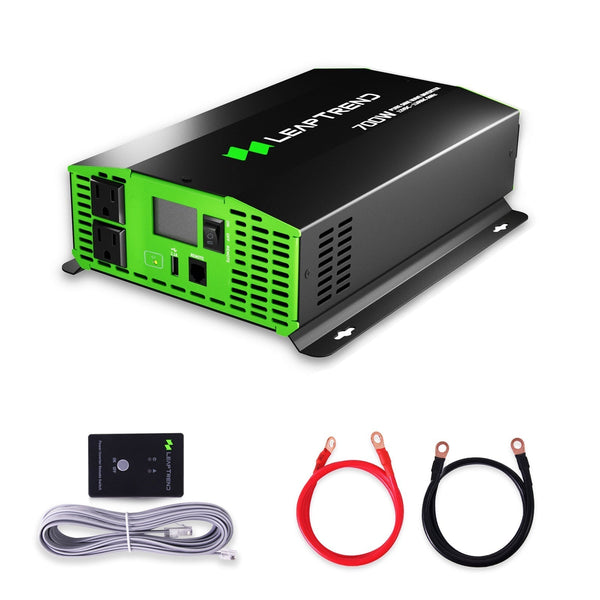
how to make a transformer, inverter 12v to 220v, power supply| Leaptrend 1000/2000 Watt Power Inverter for Lithium Batteries, DC 12V to 220V/230V AC Off-Grid Solar Pure Sine Wave Inverter on RV, Semi Truck, Heavy Duty, Camping Outdoors, for Lithium Life
Comment fabriquer un onduleur à transformateur : conversion d'une alimentation 12 V en 220 V
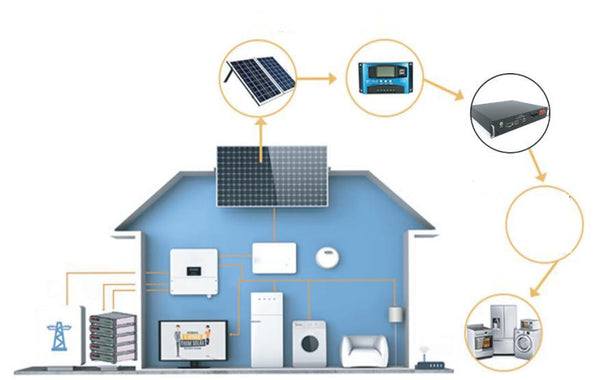
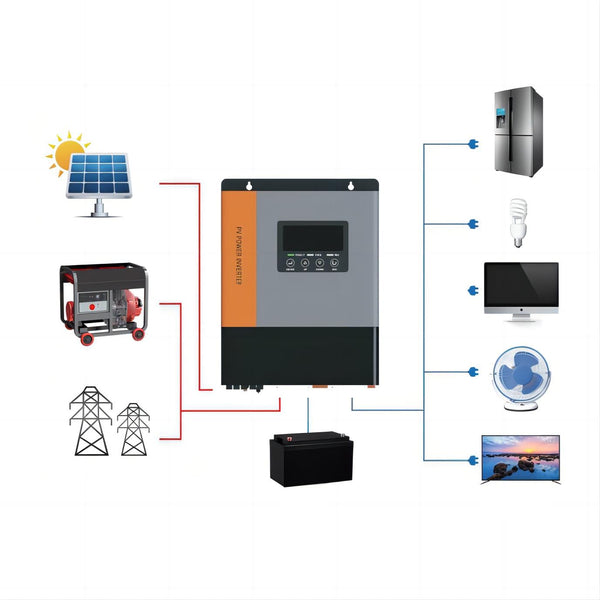
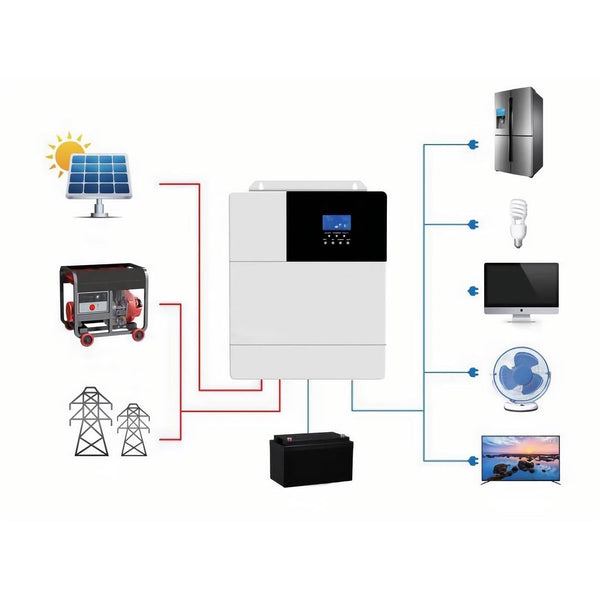
Les onduleurs sont des appareils essentiels qui permettent de convertir le courant continu en courant alternatif, permettant ainsi d'alimenter divers appareils. Si vous avez besoin d'une alimentation 220 V mais que vous ne disposez que d'une source 12 V CC, la construction d'un onduleur à transformateur peut être une solution économique. Dans cet article, nous vous guiderons dans la création d'un onduleur à transformateur capable de convertir une alimentation 12 V CC en 220 V CA. Pour une solution fiable et efficace, nous recommandons l'onduleur LeapTrend.
Matériel requis :
Pour fabriquer un onduleur à base de transformateur, vous aurez besoin du matériel suivant :
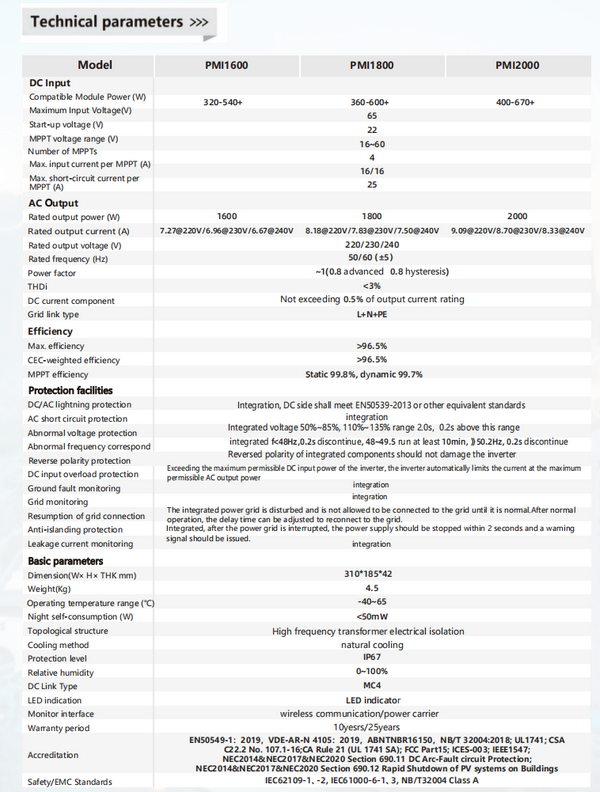
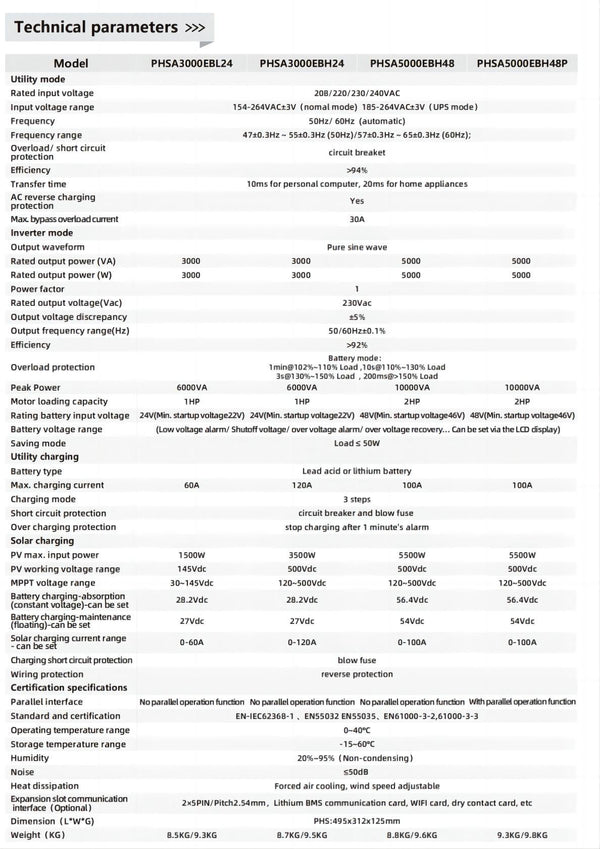
- Transformateur (12V à 220V)
- MOSFET (4)
- Résistances (différentes valeurs)
- Condensateurs (différentes valeurs)
- Diodes (différents types)
- Circuit imprimé (PCB)
- Dissipateur thermique (si nécessaire)
- Fer à souder
- Fil à souder
- Fils
- Source d'alimentation (12 V CC)
Guide étape par étape :
1. Concevez le circuit : Commencez par concevoir le circuit de votre onduleur. Vous pouvez utiliser un logiciel comme Eagle PCB pour créer le schéma électrique. La conception doit inclure les composants et les connexions nécessaires à l'onduleur à transformateur.
2. Rassemblez les composants : Une fois la conception du circuit terminée, rassemblez tous les composants nécessaires. Assurez-vous qu'ils correspondent aux spécifications décrites dans le schéma. Il est important d'utiliser des composants de haute qualité pour des performances et une sécurité optimales.
3. Préparation du circuit imprimé : Préparez le circuit imprimé en soudant les résistances, les condensateurs, les diodes et les autres composants. Suivez attentivement le schéma électrique en veillant au placement et à l'orientation corrects de chaque composant. Prenez votre temps pour obtenir des soudures nettes et fiables.
4. Installation des MOSFET : Installez les MOSFET sur le circuit imprimé. Ces composants jouent un rôle crucial dans la commutation du courant continu et la génération de la forme d'onde alternative souhaitée. Assurez-vous qu'ils sont correctement placés et solidement fixés au dissipateur thermique si nécessaire.
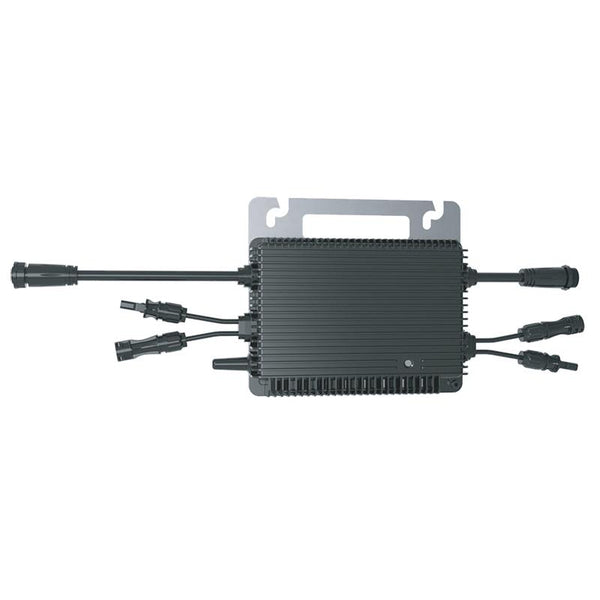
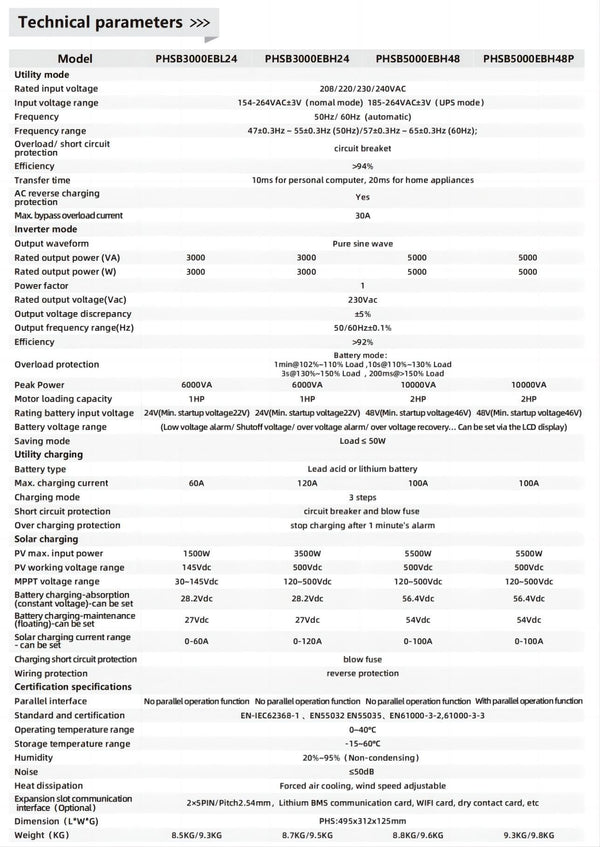
5. Connexion du transformateur : connectez l'enroulement primaire du transformateur à la sortie des MOSFET. Connectez l'enroulement secondaire du transformateur aux bornes de charge, qui fourniront la sortie 220 V CA.
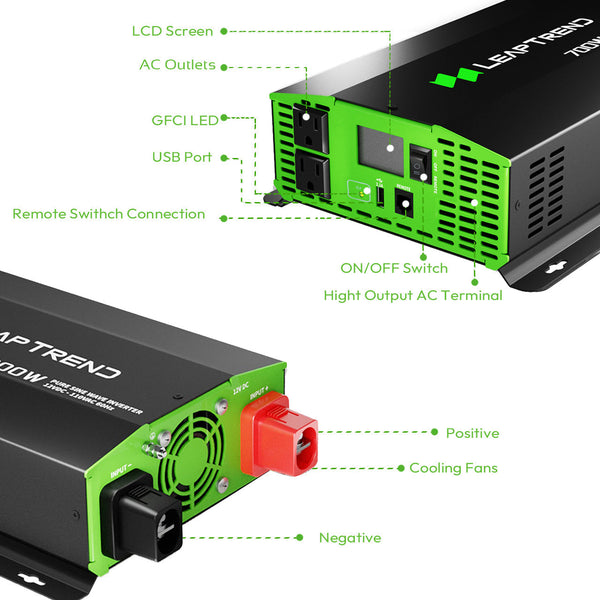
6. Branchez l'alimentation : connectez la source d'alimentation 12 V CC aux bornes d'entrée du circuit de l'onduleur. Assurez-vous que la polarité est correcte pour éviter d'endommager les composants.
7. Test de l'onduleur : Une fois tous les branchements effectués, testez votre onduleur à transformateur. Augmentez progressivement la tension d'entrée tout en surveillant la tension de sortie. Utilisez des dispositifs de charge adaptés pour vérifier la stabilité et la qualité de l'alimentation 220 V CA.
Conclusion:
Construire un onduleur à transformateur pour convertir une alimentation 12 V CC en 220 V CA est une solution pratique pour alimenter des appareils nécessitant une tension plus élevée. En suivant le guide étape par étape fourni dans cet article, vous pouvez créer votre propre onduleur et profiter du confort du courant alternatif.
Il est important de noter que travailler avec des équipements haute tension requiert des connaissances et des précautions pour garantir votre sécurité. Si vous n'êtes pas sûr de vos compétences en électricité, il est recommandé de faire appel à un professionnel ou d'envisager des onduleurs prêts à l'emploi, comme le LeapTrend. LeapTrend propose des onduleurs fiables et performants, conçus pour des performances et une sécurité optimales.
Privilégiez toujours la sécurité et soyez prudent lorsque vous travaillez avec des circuits électriques. Profitez de la construction de votre propre onduleur, mais sachez également apprécier la valeur de fabricants de confiance comme LeapTrend pour des solutions d'alimentation électrique fiables.