Aller au contenu
Comment tester l'onduleur sur un camping-car
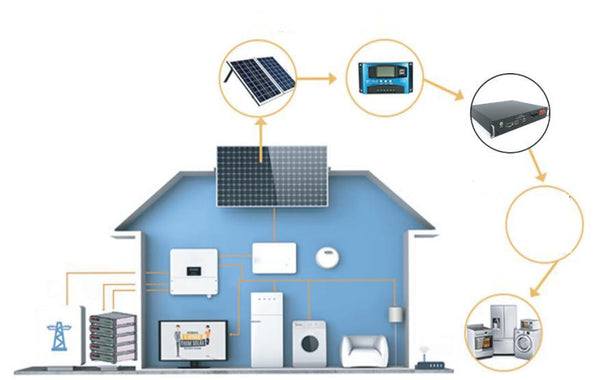
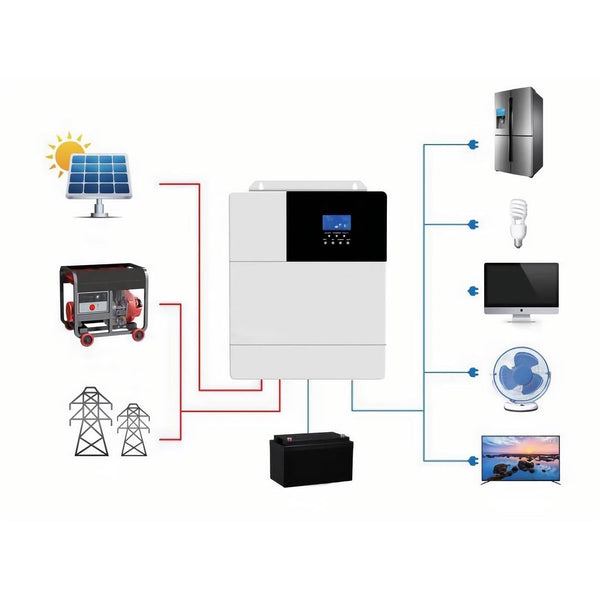
Posséder un camping-car (véhicule récréatif) vous permet de profiter du confort de votre maison même en déplacement. Parmi ces équipements, les onduleurs jouent un rôle essentiel : ils convertissent le courant continu de la batterie en courant alternatif, permettant ainsi l'utilisation d'appareils électroménagers tels que les téléviseurs et les fours à micro-ondes. Cependant, une panne d'onduleur peut entraîner des désagréments importants. Apprendre à tester un onduleur de camping-car est essentiel pour tout propriétaire de camping-car.
Préparation aux tests
Avant de tester l'onduleur de votre camping-car , il est important de vous assurer que vous et votre camping-car êtes en sécurité. Voici quelques préparatifs essentiels :
Débrancher les appareils électriques
Débranchez tous les appareils connectés à l’onduleur pour éviter tout dommage ou choc électrique.
Éteignez l'onduleur : localisez l'interrupteur de l'onduleur et éteignez-le avant d'effectuer des tests.
outils de collecte
Rassemblez les outils nécessaires tels qu’un voltmètre, un tournevis et tous les manuels ou instructions pour votre modèle de VR et votre onduleur.

Processus de test réel de l'onduleur RV
Étape 1 : Inspection visuelle
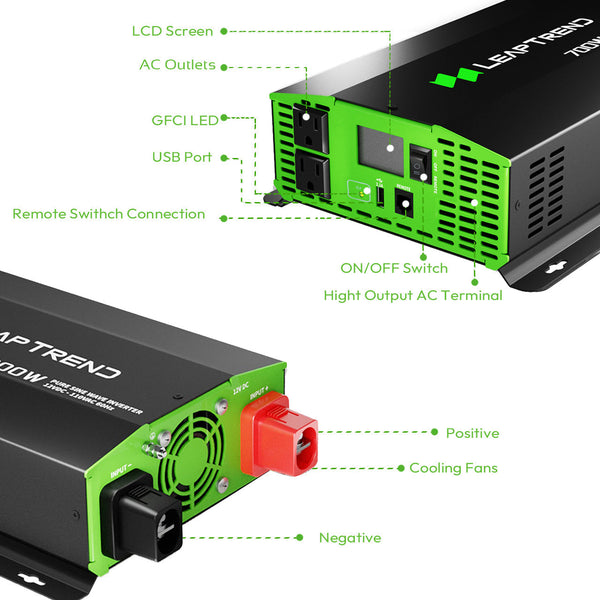
Commencez par inspecter visuellement l'onduleur pour détecter tout signe de dommage, de décoloration ou de connexions desserrées. Recherchez des composants ou des fils brûlés, susceptibles d'indiquer un problème.
Étape 2 : Vérification de la tension
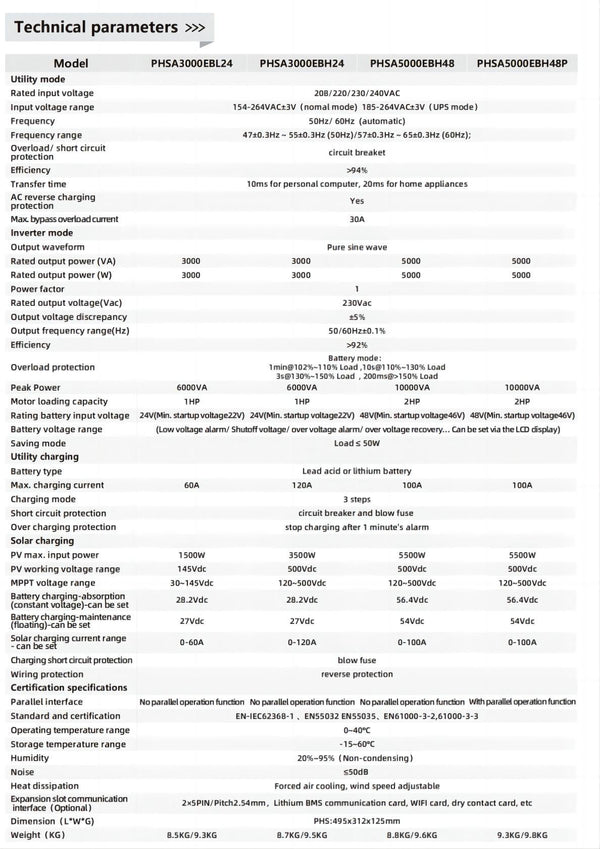
Utilisez un voltmètre pour vérifier la tension de sortie de l'onduleur. Réglez le voltmètre sur la tension alternative et connectez les sondes aux bornes correspondantes de l'onduleur. Lorsque l'onduleur est sous tension, vous devriez obtenir une tension proche de sa tension nominale (généralement 110 V ou 120 V). Une tension nettement inférieure, voire inexistante, peut indiquer un problème avec l'onduleur.
Étape 3 : Test de charge
Pour effectuer un test de charge, connectez une charge connue à l'onduleur, comme une ampoule ou un petit appareil. Allumez la charge et surveillez ses performances. Si la charge fonctionne normalement, l'onduleur fonctionne également. En revanche, si la charge vacille ou ne s'allume pas du tout, cela peut indiquer un problème de capacité de l'onduleur à gérer la charge.
Étape 4 : Examen auditif
Écoutez attentivement le bruit de l'onduleur pendant son fonctionnement. Des bruits inhabituels tels que des clics, des bourdonnements ou des grincements peuvent indiquer un problème avec les composants internes de l'onduleur.
Dépannage et réparation
Si vous rencontrez des problèmes lors des tests, consultez le manuel de votre VR et les spécifications de l'onduleur pour obtenir des conseils de dépannage. Selon la nature du problème, vous devrez peut-être remplacer certains composants, voire l'onduleur entier. Si vous hésitez à effectuer ces réparations, il est préférable de faire appel à un technicien VR professionnel.
Apprendre à tester un onduleur de camping-car est essentiel pour tout propriétaire de camping-car. En suivant les étapes décrites dans ce guide, vous vous assurerez que votre onduleur fonctionne correctement et fournit une alimentation électrique sûre et fiable à votre équipement. N'oubliez pas de toujours privilégier la sécurité lors de vos tests et réparations électriques, et n'hésitez pas à faire appel à un professionnel en cas de besoin.